

Writing a Smart Contract to mint NFTs in less than 10 minutes
using OpenZeppelin, RemixIDE, Solidity


What are we building/doing today?
- Write & modify a simple Smart Contract using Remix and OpenZeppelin
- Deploy the smart contract to Polygon Mumbai testnet blockchain
- Host the NFT tokens metadata on IPFS
- Mint an NFT and see it on NFT marketplaces like OpenSea or Rarible
Tools we'll be using
- OpenZeppelin Contracts Wizard
- Remix IDE
- Pinata or Filebase - Needs Signup
- Metamask or any Ethereum Wallet
Let's start building
Step 1: Build the ERC721 Smart Contract w/ OpenZeppelin Contracts Wizard
Open the OpenZeppelin Contracts Wizard Page. Click on the ERC721 button in the top left corner.
On the left sidebar, you should see a number of options:
Click on the text box with “MyToken” and give it a name, do the same with the Symbol, and leave the base URI field blank (the token name will be used by OpenSea and Rarible as the name of the collection).
Selecting the ERC721 token features. For our use case, we would need -
Mintable,Auto Increment IDs,EnumerableandURI StorageMintablewill create a mint function only callable by privileged accountsAuto Increment IDswill automatically assign incremental IDs to your NFTsEnumerablewill give you access to on-chain Tokens enumeration and functions such as “totalSupply”, not present in the default ERC721 integration URI storage, to associate metadata and images to each of your NFTsURI Storageto be able to associate URIs to our NFTs
Since we aren't creating any Tokenomics around our NFTs, keep Burnable, Pausable and Votes unticked.
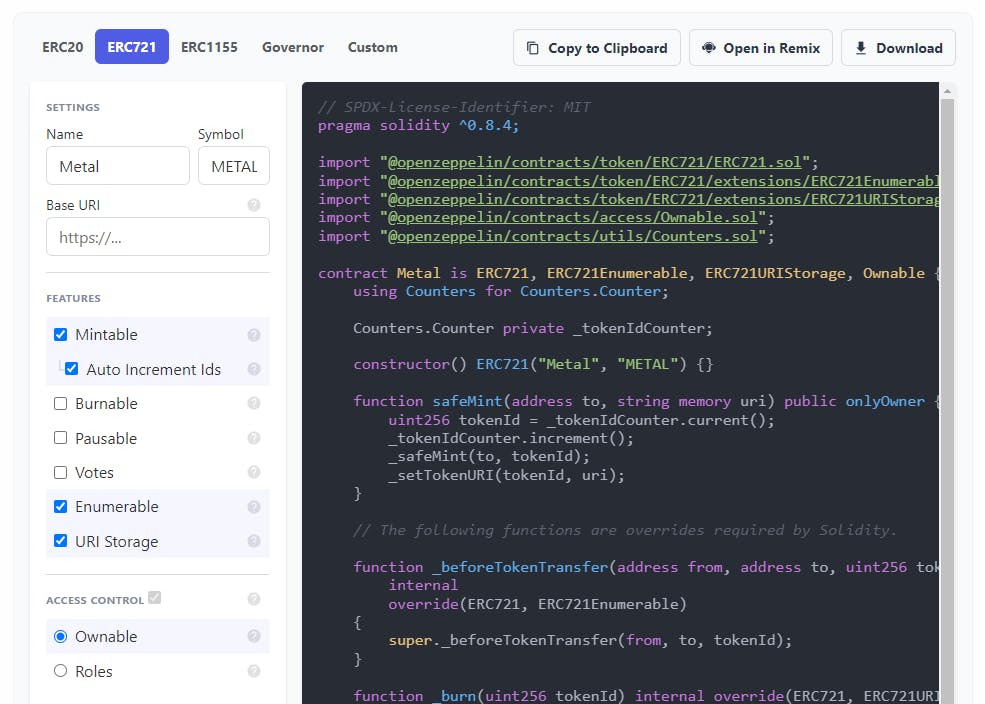
The Smart Contract should look something like this:
// SPDX-License-Identifier: MIT

// SPDX License Identifiers can be used to indicate relevant license information at any level, from package to the source code file level.

pragma solidity ^0.8.4;

// pragma is a directive that specifies the compiler version to be used for current Solidity file.

import "@openzeppelin/contracts/token/ERC721/ERC721.sol";
import "@openzeppelin/contracts/token/ERC721/extensions/ERC721Enumerable.sol";
import "@openzeppelin/contracts/token/ERC721/extensions/ERC721URIStorage.sol";
import "@openzeppelin/contracts/access/Ownable.sol";
import "@openzeppelin/contracts/utils/Counters.sol";

contract Metal is ERC721, ERC721Enumerable, ERC721URIStorage, Ownable {

    using Counters for Counters.Counter;
    Counters.Counter private _tokenIdCounter;
    constructor() ERC721("Metal", "METAL") {}

    function safeMint(address to, string memory uri) public onlyOwner
  {
        uint256 tokenId = _tokenIdCounter.current();
        _tokenIdCounter.increment();
        _safeMint(to, tokenId);
        _setTokenURI(tokenId, uri);
    }

    // The following functions are overrides required by Solidity.

    function _beforeTokenTransfer(address from, address to, uint256 tokenId)
        internal
        override(ERC721, ERC721Enumerable)
    {
         super._beforeTokenTransfer(from, to, tokenId);
    }

    function _burn(uint256 tokenId) internal override(ERC721, ERC721URIStorage)
    {
        super._burn(tokenId);
    }

    function tokenURI(uint256 tokenId)
        public
        view
        override(ERC721, ERC721URIStorage)
        returns (string memory)
    {
        return super.tokenURI(tokenId);
    }

    function supportsInterface(bytes4 interfaceId)
        public
        view
        override(ERC721, ERC721Enumerable)
        returns (bool)
    {
        return super.supportsInterface(interfaceId);
    }
}
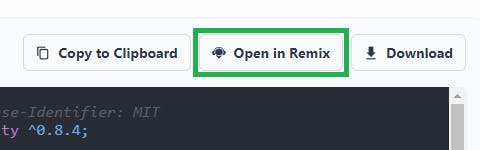
That's all with the Contracts Wizard. Click on Open in Remix for the next steps.
Step 2: Modifying the Smart Contract w/ Remix
The safeMint function has the onlyOwner modifier - which will allow only the owner of the smart contract (the account/address that deployed the contract) to mint NFTs. Since we want any user to mint the NFTs, we'll need to remove the onlyOwner modifier from the function. Also, remove it from the Contract declaration Ownable and the library imports.
function safeMint(address to, string memory uri) public {
        uint256 tokenId = _tokenIdCounter.current();
        _tokenIdCounter.increment();
        _safeMint(to, tokenId);
        _setTokenURI(tokenId, uri);
}
Now that everyone will be able to mint our NFTs, we'll need to avoid users from minting more NFTs than the max number of NFTs in our collection. Add this line before the constructor
Counters.Counter private _tokenIdCounter;

uint256 MAX_SUPPLY = 100000;

constructor() ERC721("Metal", "METAL") {}
Add this require statement as the first line in the safeMint function
require(_tokenIdCounter.current() <= MAX_SUPPLY, "I'm sorry we reached the cap");
The Contract should look something like this:
// SPDX-License-Identifier: MIT
pragma solidity ^0.8.4;

import "@openzeppelin/contracts/token/ERC721/ERC721.sol";
import "@openzeppelin/contracts/token/ERC721/extensions/ERC721Enumerable.sol";
import "@openzeppelin/contracts/token/ERC721/extensions/ERC721URIStorage.sol";
import "@openzeppelin/contracts/utils/Counters.sol";

contract Metal is ERC721, ERC721Enumerable, ERC721URIStorage {
    using Counters for Counters.Counter;

    Counters.Counter private _tokenIdCounter;

    uint256 MAX_SUPPLY = 100000;           // max number of NFTs that can be minted

    constructor() ERC721("Metal", "METAL") {}

    // modified safeMint function, this will be used to mint the NFTs

    function safeMint(address to, string memory uri) public {
        require(_tokenIdCounter.current() <= MAX_SUPPLY, "I'm sorry we reached the cap");
        uint256 tokenId = _tokenIdCounter.current();
        _tokenIdCounter.increment();
        _safeMint(to, tokenId);
        _setTokenURI(tokenId, uri);
    }

    // The following functions are overrides required by Solidity.

    function _beforeTokenTransfer(address from, address to, uint256 tokenId)
        internal
        override(ERC721, ERC721Enumerable)
    {
        super._beforeTokenTransfer(from, to, tokenId);
    }

    function _burn(uint256 tokenId) internal override(ERC721, ERC721URIStorage) {
        super._burn(tokenId);
    }

    function tokenURI(uint256 tokenId)
        public
        view
        override(ERC721, ERC721URIStorage)
        returns (string memory)
    {
        return super.tokenURI(tokenId);
    }

    function supportsInterface(bytes4 interfaceId)
        public
        view
        override(ERC721, ERC721Enumerable)
        returns (bool)
    {
        return super.supportsInterface(interfaceId);
    }
}
Step 3: Deploying the Smart Contract to the Testnet
A Testnet is an instance of a blockchain-powered by the same or a newer version of the underlying software, to be used for testing and experimentation without risk to real funds or the main chain. Testnet coins are separate and distinct from the official (mainnet) coins, don't have value, and can be obtained freely from faucets.
We'll be deploying our smart contract to the Polygon Mumbai Testnet.
First, go to mumbai.polygonscan.com, scroll down to the footer and click on Add Mumbai Network to add Polygon Testnet to Metamask Wallet.

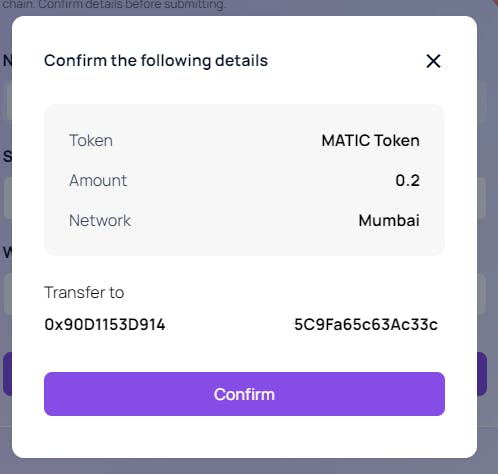
We'd require Testnet $MATIC to pay for gas fees when deploying the contract to the testnet. Go to faucet.polygon.technology, paste your wallet address and submit. You'll
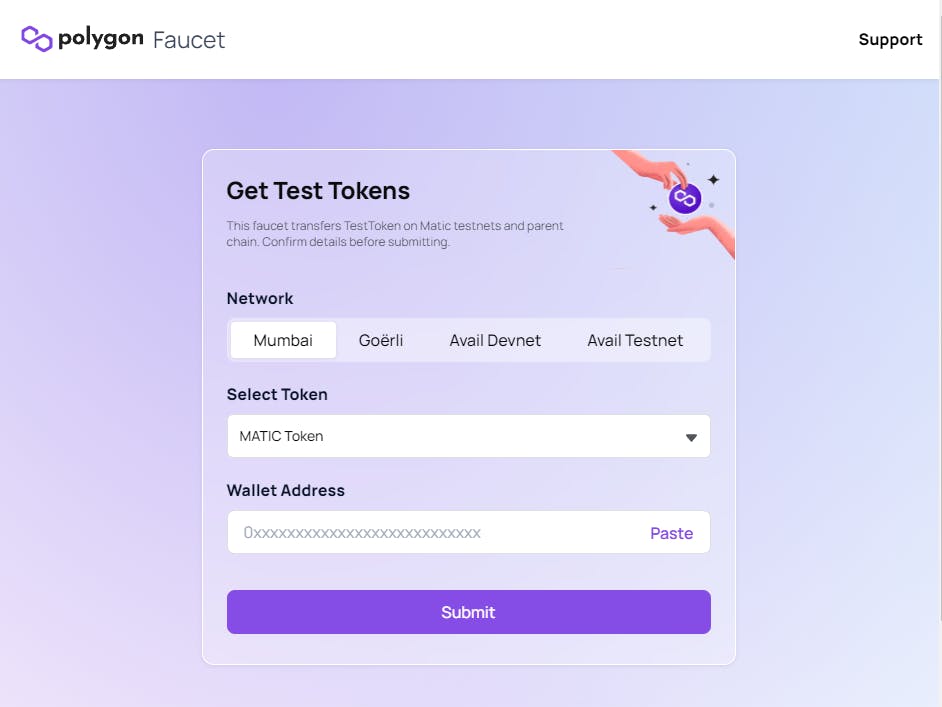
The wallet will receive 0.2 Testnet $MATIC, and that should be more than enough as gas prices are super low on the Polygon chain (on mainnet as well)
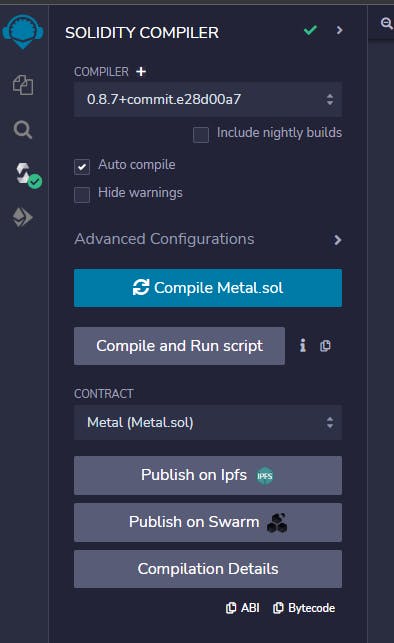
Go back to Remix, and open the Solidity Compiler on the left sidebar. Click the Compile button, if there is a green tick on the Solidity Compiler logo we're good to go. Also, tick the Auto Compile option so that it auto-compiles on change.
Go to Deploy & Run Transactions tab, select Injected Provider - Metamask environment. If this is your first time using Remix, Metamask will ask you to Connect Wallet to Remix, this is safe to do and does not cost any $MATIC
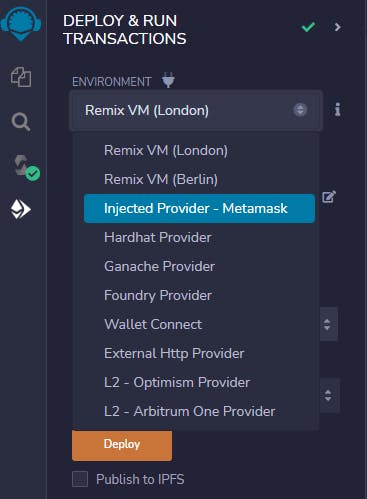
Make sure the Metamask wallet is on the Polygon Testnet, select your smart contract from the Contract Dropdown menu and click on Deploy

A Metamask pop-up window will appear, click on "sign", and proceed to pay the gas fees.
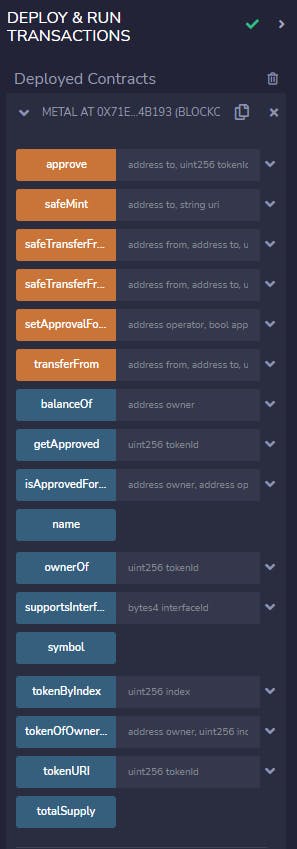
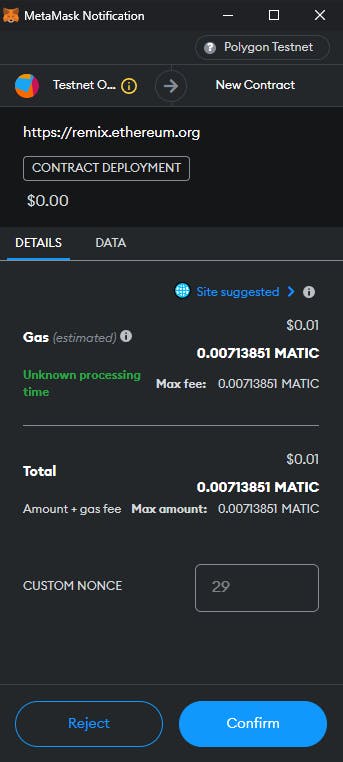 If everything worked as expected, after 10-15 seconds, you should see the contract listed under Deployed Contracts
Step 4: NFT Metadata
For OpenSea to pull in off-chain metadata for ERC721 tokens, the contract will need to return a URI pointing to the hosted metadata. To find this URI, OpenSea, Rarible and other popular marketplaces will use the tokenURI method contained in the ERC721URIStorage standard.
The tokenURI function in the ERC721 should return an HTTP or IPFS URL which when queried, should return a JSON blob of data with the metadata for your token.
According to the OpenSea documentation, the NFT metadata should be stored in a .json file and structured as
{
  "description": "NFT DESCRIPTION",
  "external_url": "YOUR URL",
  "image": "IMAGE URL",
  "name": "TITLE",
  "attributes": [
    {
      "trait_type": "type1",
      "value": "value1"
    },
   {
      "trait_type": "type2",
      "value": "value2"
    },
    {
      "display_type": "display type 1",
      "trait_type": "type3",
      "value": "value3"
    },
  ]
  }
Step 5: Uploading Metadata to IPFS
Create a bucket on Filebase. Upload the image you wish to mint as NFT. Copy the CID of that image.
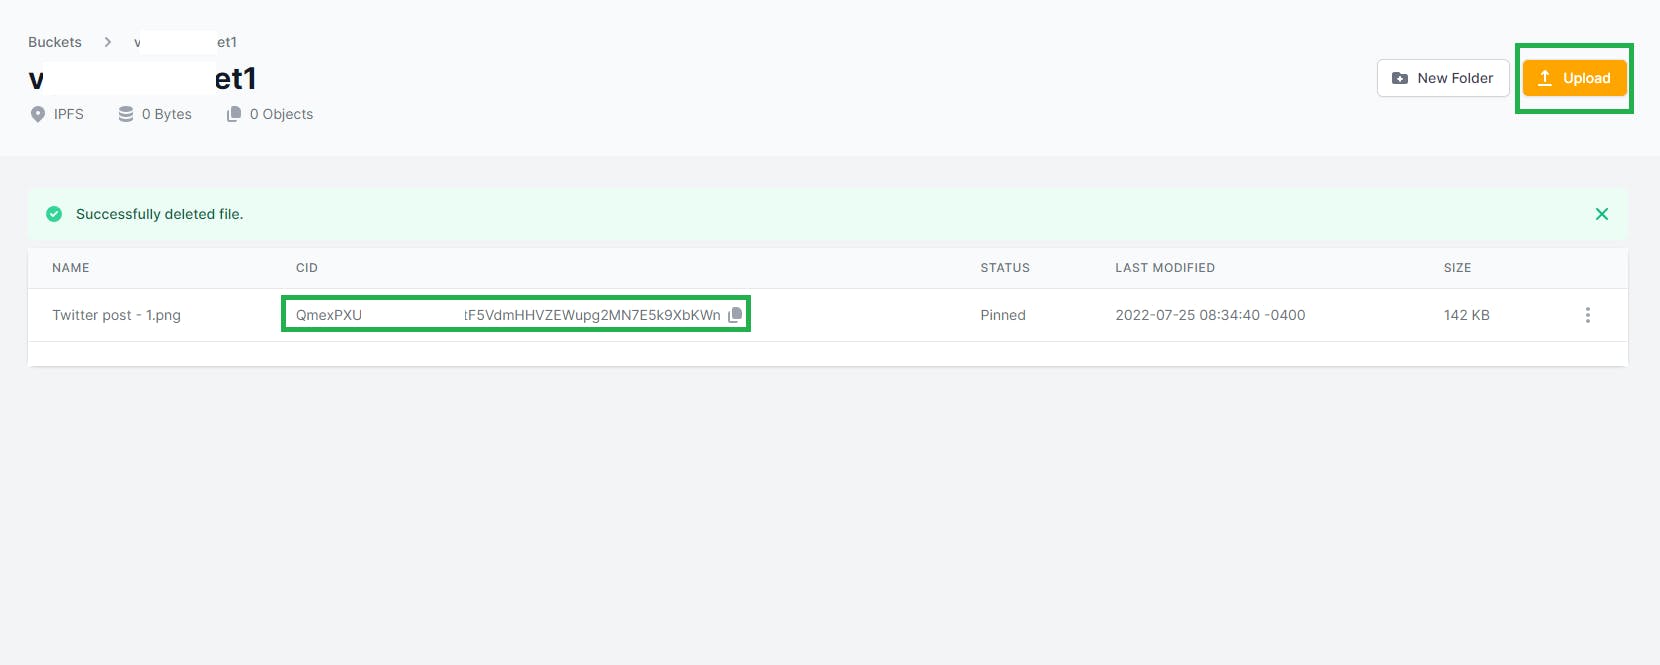
Create a new file on your device, and name it metadata.json. Copy the code and paste it, and replace the CID of the uploaded image in this file.
{
  "description": "Made this NFT seeing @vijethx's blog",
  "external_url": "https://vijeth.hashnode.dev",
  "image": "https://ipfs.filebase.io/ipfs/QmexPXU********F5VdmHHVZEWupg2MN7E5k9XbKWn",
  "name": "A super cool NFT",
  "attributes": [
    {
      "trait_type": "Tweet",
      "value": "Yes"
    },
    {
      "trait_type": "AI",
      "value": "Yes"
    },
    {
      "display_type": "number",
      "trait_type": "Generation",
      "value": "2"
    }
  ]
 }
Upload metadata.json to Filebase. Copy its CID
Step 6: Minting the NFTs on Testnet
Go back to Remix, in the Deploy & Run Transactions menu, go under Deployed Contracts and click on the contract we just deployed.
Methods in Orange are the methods that actually write on the blockchain whereas the methods in Blue are the methods learning from the blockchain
Click on the safeMint method dropdown icon and paste your wallet address and the copied CID of metadata.json as ipfs://<your_metadata_cid> into the URI field.
Click on Transactand a Metamask Popup will open, prompting you to pay the gas fees. Wait for the transaction to complete.
AND YOU'VE JUST MINTED YOUR VERY FIRST NFT 🎉🎉🎉🎉
What's next?
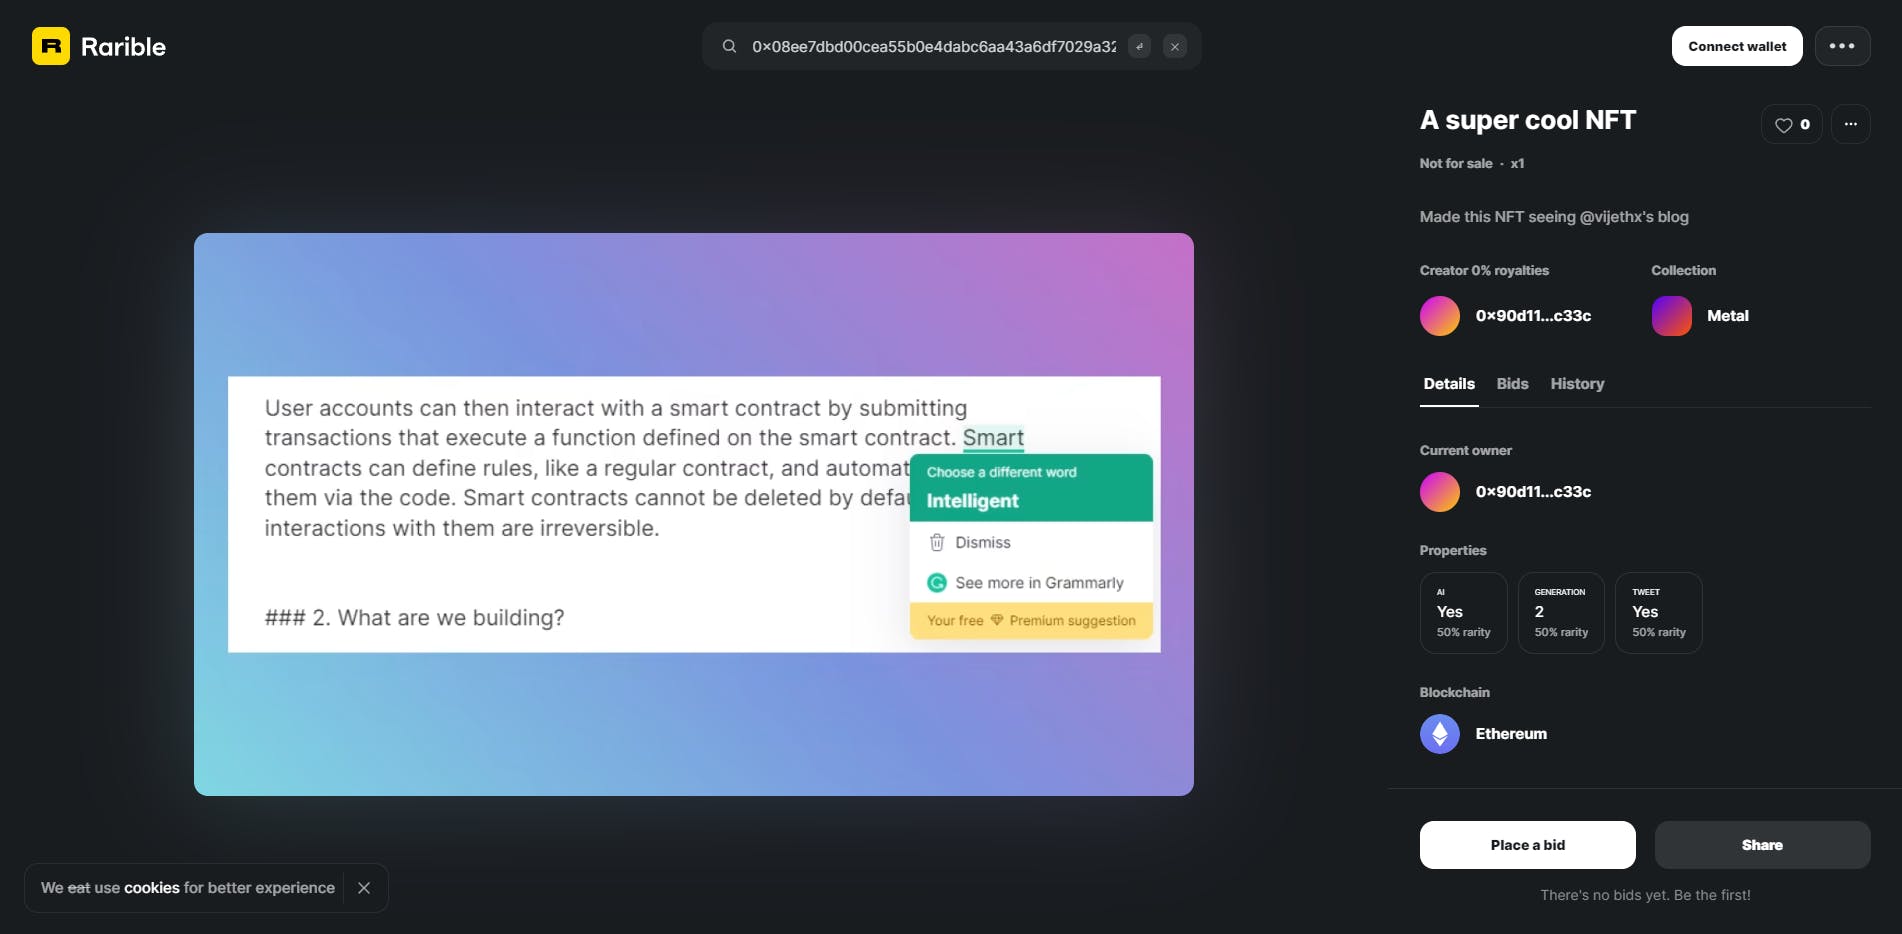
Navigate to testnets.opensea.io or testnet.rarible.com, search with your wallet address and you'll find your NFT!
It might take some time to display the metadata, it should look something like this -> testnet.rarible.com/token/0x08ee7dbd00cea55..
Reach out to me on Twitter with any suggestions or ideas :)
Thanks for reading and GM ☀